Well I have finally got some pictures of all the work I've done around here! This has been a busy holiday season for me. My sister moved into a house just a hop, skip and a jump from my house two weeks ago. I am beyond thrilled to have some family in town finally! I have been over there almost daily for morning coffee, floor scrubbing and wall painting. Her house has come along great, my blog however has not. Toss a 8th birthday party for my Megan and nothing that doesn't HAVE to get done gets done.
On to the fun stuff.
We started decorating this year later than usual due to a trip to my Mom's house in Lake Havasu City for Thanksgiving week...next year I may just have some stuff up before our trip so I don't feel behind when we get home.
I now am the proud owner of two trees...our 7' one ended up in the living room in the front window this year...LOVE! Our 4' baby tree is in the dinning room so I can see some prettiness when I am cooking.
 |
| Our 7' tree |
 |
| My baby tree all lit up! |
Please forgive my photos, I am still working on getting the just right tree picture. I love our tree this year. I have a love of all things red and white for the holidays. I added this new netting stuff (I doubt its new, just new to me) to our tree and really like it. I am not a garland type of girl and the ribbons made me angry last year. I did toss a little green in here and there too...I am liking this new lime green that is out and about.
My little village vignettes are a new addition this year. I have had some of these houses for years. But never made them the star of the show.
They now have a new meaning for us. The bulk of these were given to me by my Mother in law Becky the Christmas before she passed away. They obviously are very special to me and I was so glad to finally have some space to have them out. It feels like she still has a hand in holiday decorating.
Candy Village, 50% from my Mom and 50% from my Mother in law. this is on top of our hutch in the dinning room...no little boys (who shall remain nameless) will be breaking all my special stuff!
This is our Christmas Village...errr uhhh village. tee he
This is 90% Mother in law and 10% me. I have this village in the oddly placed hole in the wall for a TV that we have never used for a TV or really have no idea what to do with for the rest of the year. Can I keep the village up all year???
So how did I make such a great little town? Shipping boxes, old Tupperware and plastic cups. Cover it in the blanket snow stuff and batting. Pretty good huh?
A little tip...put the timer in the outlet first then do your arranging...not that I did that or anything!
Here is a shot from my kitchen of our dinning room decor this year. We finally figured out what the deal was with our fireplace (apparently if you turn the gas off the pilot light goes out and you have to relight it...with the gas on...go figure) so its in working order! I love having the fire going while we visit at the table after dinner.
I went a little crazy with the mesh netting stuff this year, but I do love the color. I have some ideas for DIY garland for next year I'll have to make now since its a high possibility that I wont remember next year.


I love having a mantle. I had hoped to make some changes to it this year by changing the tile surround and adding some molding but that didn't work out...maybe this year.

Our nutcrackers...we need to get one for this year. My husband and I have purchased a new one ever year since we got married. I imagine when we have been married for 30 years I will be overrun with Nutcrackers!
My poor little baby trees get a beating. My almost 2 year old thinks they make great toys. I end up picking them up around the house all day long. Next year he will listen better right? "We just look, no touching"
Want some more Christmas tree love? Well you are getting it anyway!
Here are some of my nighttime shots from last night...some I think are great...others not so great. It's the thought that counts.

Tree looks awesome...Santa is in the dark...bummer!

One of my three Pottery Barn ornaments. I love it. If I had to pick one holiday decor item that was me to a T it would be this one! I'm all about the whimsey and fun of the holiday.

Ho! Ho! Ho! I got this Santa years ago. He was the main element of my front door wreath for years. Now he gets a prime spot on our tree.

I have two candycane ornaments...I think I just may add to this collection during my after Christmas shopping. Yet another thing in 30 years to be overrun with! I just realized that I have a light out...how embarrassing! I'll have to fix that tonight.

Megan's 1st Christmas ornament. She loves it and HAS to be the one to put it on our tree every year. Her brother enjoys taking it off and watching her flip out. That would probably be why his 1st Christmas ornament is MIA. I know I put it on the tree...now oddly...I can not find it. Go figure.

Our wedding year ornament. Our three year anniversary is this December 27th. Christmas was a hard time to have a wedding, but I do love that it is such a special time of year for us for so many reasons. Bonus, we only have to pay for the wedding once!

This is a better view of the awkward TV hole...any suggestions on what I should do with this the rest of the year?

I think I love this village even more at night all lit up. The two outside top houses have LED lights for Christmas lights. They change colors and do that light dance thing...they are awesome houses.

Looking at my mantel now, I am thinking I may just do my garland idea this week before christmas...the beeds are doing nothing for me. Oh well.
I hopefully will be back tomorrow with pictures of our outdoor wreath and lights...I also plan on doing a few tweeks to our front porch.
Thanks for stopping by! Lets do coffee!

My little village vignettes are a new addition this year. I have had some of these houses for years. But never made them the star of the show.
They now have a new meaning for us. The bulk of these were given to me by my Mother in law Becky the Christmas before she passed away. They obviously are very special to me and I was so glad to finally have some space to have them out. It feels like she still has a hand in holiday decorating.
 |
Candy Village, 50% from my Mom and 50% from my Mother in law. this is on top of our hutch in the dinning room...no little boys (who shall remain nameless) will be breaking all my special stuff!
 |
| Nighttime village ready for a party. |
This is our Christmas Village...errr uhhh village. tee he
This is 90% Mother in law and 10% me. I have this village in the oddly placed hole in the wall for a TV that we have never used for a TV or really have no idea what to do with for the rest of the year. Can I keep the village up all year???
 | ||
A little tip...put the timer in the outlet first then do your arranging...not that I did that or anything!
Here is a shot from my kitchen of our dinning room decor this year. We finally figured out what the deal was with our fireplace (apparently if you turn the gas off the pilot light goes out and you have to relight it...with the gas on...go figure) so its in working order! I love having the fire going while we visit at the table after dinner.
I went a little crazy with the mesh netting stuff this year, but I do love the color. I have some ideas for DIY garland for next year I'll have to make now since its a high possibility that I wont remember next year.


I love having a mantle. I had hoped to make some changes to it this year by changing the tile surround and adding some molding but that didn't work out...maybe this year.

Our nutcrackers...we need to get one for this year. My husband and I have purchased a new one ever year since we got married. I imagine when we have been married for 30 years I will be overrun with Nutcrackers!
My poor little baby trees get a beating. My almost 2 year old thinks they make great toys. I end up picking them up around the house all day long. Next year he will listen better right? "We just look, no touching"
Want some more Christmas tree love? Well you are getting it anyway!
Here are some of my nighttime shots from last night...some I think are great...others not so great. It's the thought that counts.
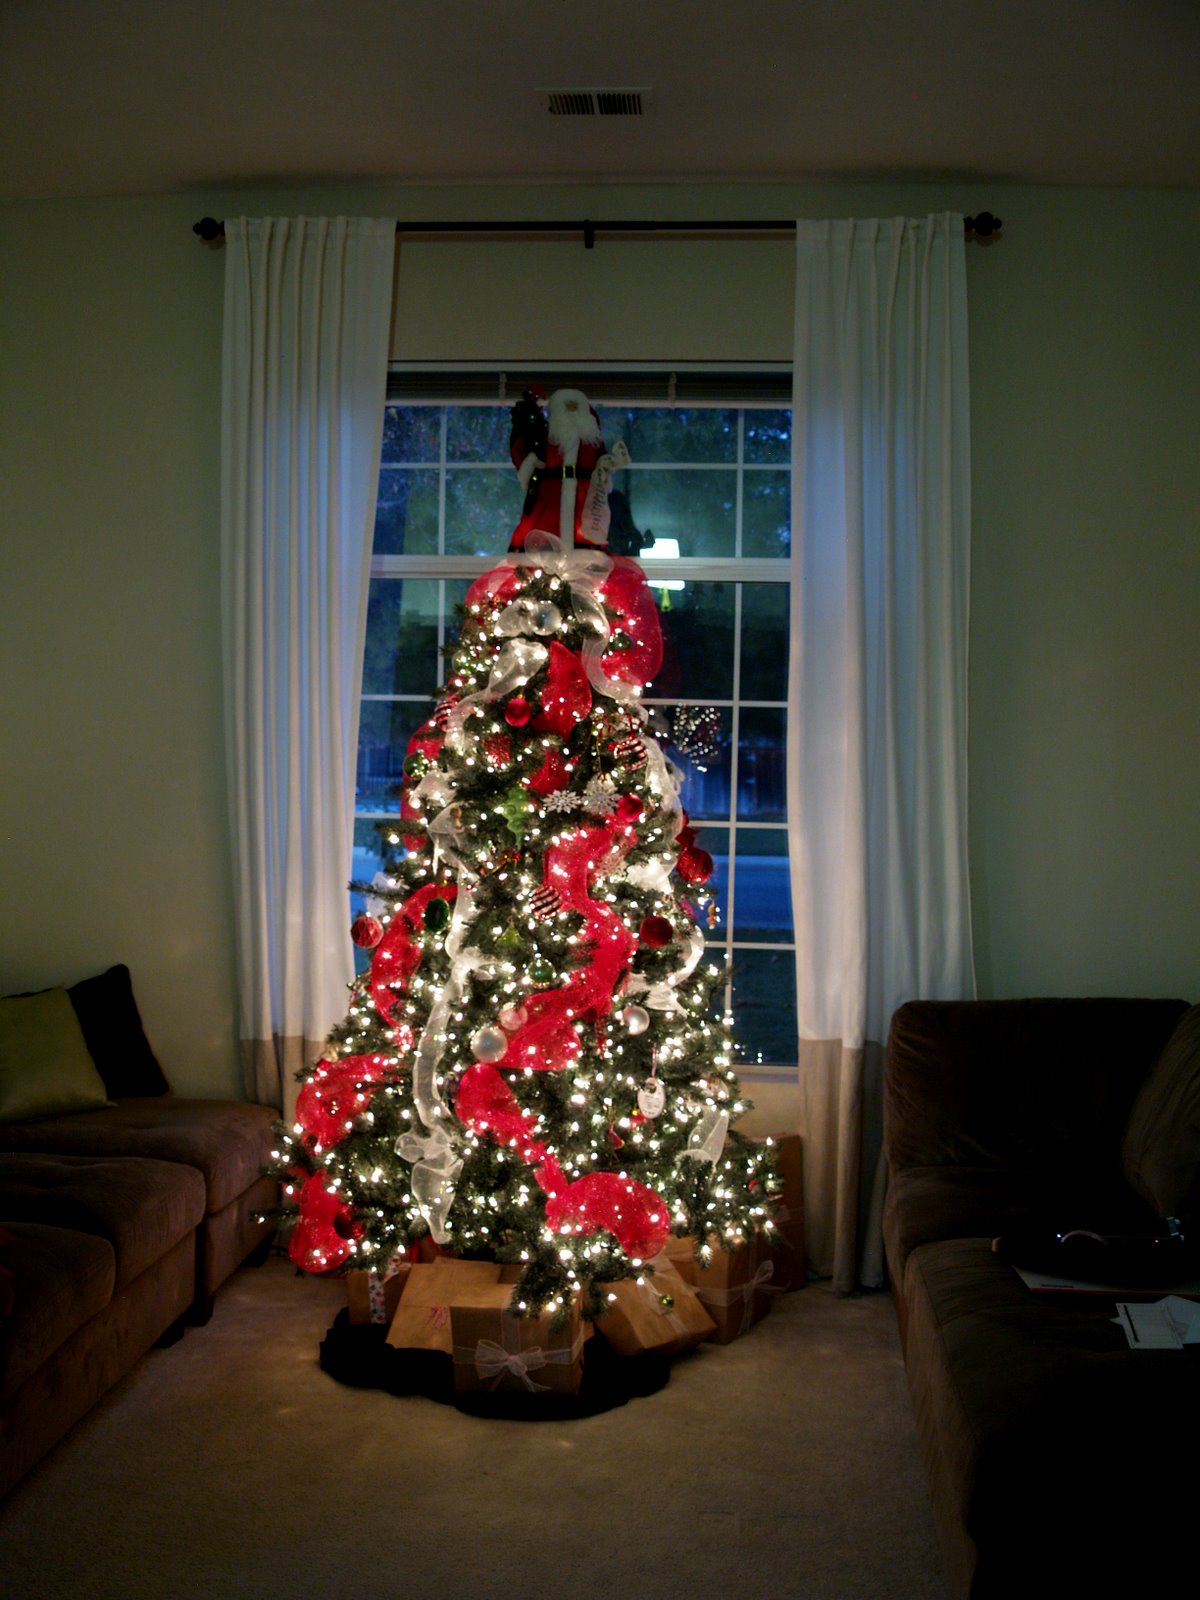
Tree looks awesome...Santa is in the dark...bummer!

One of my three Pottery Barn ornaments. I love it. If I had to pick one holiday decor item that was me to a T it would be this one! I'm all about the whimsey and fun of the holiday.

Ho! Ho! Ho! I got this Santa years ago. He was the main element of my front door wreath for years. Now he gets a prime spot on our tree.

I have two candycane ornaments...I think I just may add to this collection during my after Christmas shopping. Yet another thing in 30 years to be overrun with! I just realized that I have a light out...how embarrassing! I'll have to fix that tonight.

Megan's 1st Christmas ornament. She loves it and HAS to be the one to put it on our tree every year. Her brother enjoys taking it off and watching her flip out. That would probably be why his 1st Christmas ornament is MIA. I know I put it on the tree...now oddly...I can not find it. Go figure.

Our wedding year ornament. Our three year anniversary is this December 27th. Christmas was a hard time to have a wedding, but I do love that it is such a special time of year for us for so many reasons. Bonus, we only have to pay for the wedding once!

This is a better view of the awkward TV hole...any suggestions on what I should do with this the rest of the year?

I think I love this village even more at night all lit up. The two outside top houses have LED lights for Christmas lights. They change colors and do that light dance thing...they are awesome houses.

Looking at my mantel now, I am thinking I may just do my garland idea this week before christmas...the beeds are doing nothing for me. Oh well.
I hopefully will be back tomorrow with pictures of our outdoor wreath and lights...I also plan on doing a few tweeks to our front porch.
Thanks for stopping by! Lets do coffee!